How to Design a Web Page in Asp.net Using C
Prerequisites:
- Download and Install Microsoft SQL Server Management Studio
- Download and Setting Up Visual Studio Community Version
MVC stands for Model View Controller. It is a design pattern that is employed to separate the business logic, presentation logic, and data. Basically, it provides a pattern to style web application. As per MVC, you can divide the application into 3 Layers as follows:
1. Model Layer: The Model component corresponds to all or any of the data-related logic that the user works with. This will represent either the info that's being transferred between the View and Controller components or the other business logic-related data. For instance, a Customer object will retrieve the customer information from the database, manipulate it, and update its data back to the database or use it to render data.
2. View Layer: The View component is employed for all the UI logic of the appliance. For instance, the Customer view will include all the UI components like text boxes, dropdowns, etc. that the ultimate user interacts with.
3. Controller: Controllers act as an interface between Model and consider components to process all the business logic and incoming requests, manipulate data using the Model component, and interact with the Views to render the ultimate output. For instance, the Customer controller will handle all the interactions and inputs from the Customer View and update the database using the Customer Model. An equivalent controller is
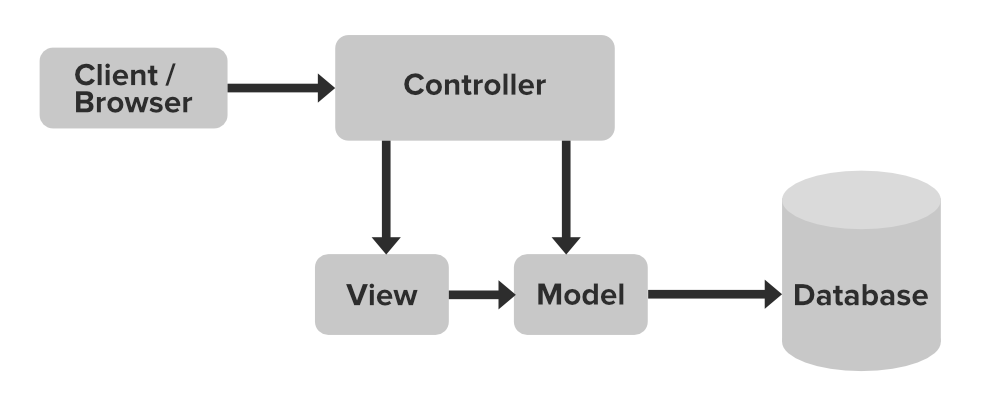 going to be wont to view the Customer data.
ASP.NET is a server-side web application framework created by Microsoft that runs on Windows and was started in the early 2000s. ASP.NET allows developers to make web applications, web services, and dynamic content-driven websites. The latest version of ASP.NET is 4.7.1
To learn how to set up projects in visual studio and how to create a database, refer to below-given links:
- Create a database in MS-SQL Server Management Studio
- Create a project in visual studio
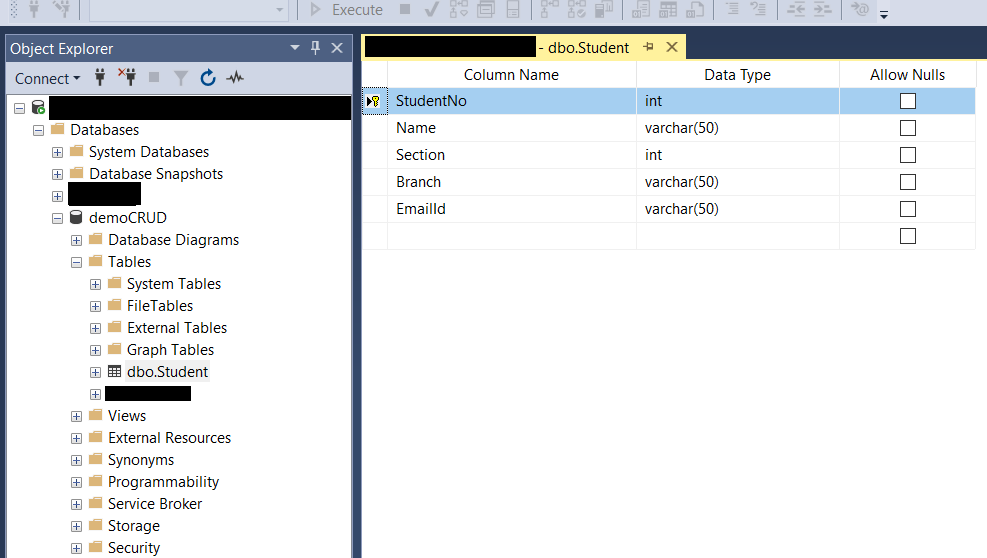
1. Create a Database with the following columns: This is just a demo to make you understand the code in the article. You can create your own database according to your needs.
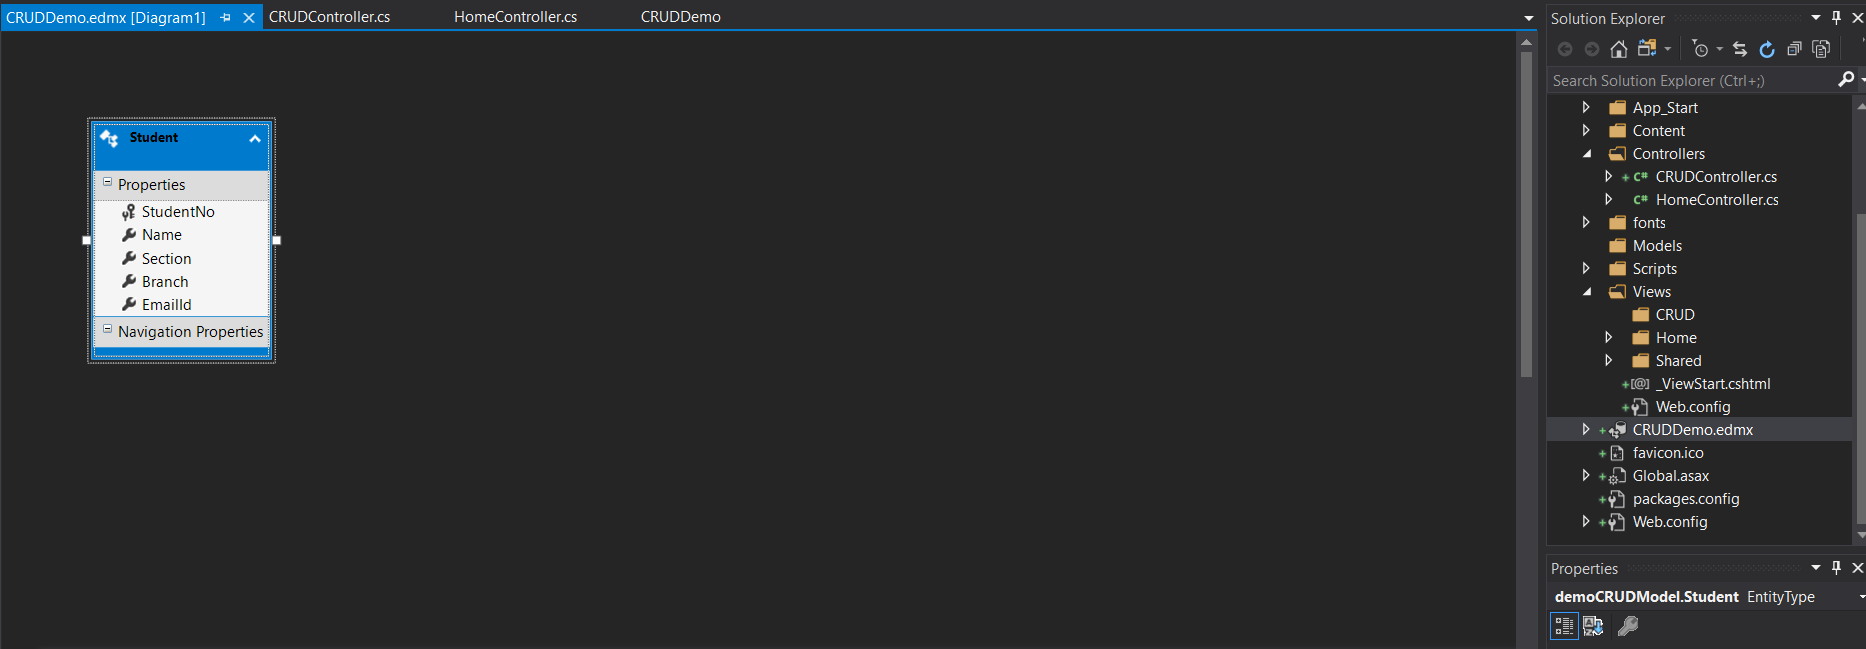
2. Create a Project in Visual Studio Follow the guidelines that are given in the link provided above to create a project. After creating the project add entity data model to add connection string to your web.config file, to do so follow this article Add Entity Data Model to Your ASP.NET Project. The following EDMX diagram will be shown on your solution window.
ASP.NET CRUD (Create, Read, Update, Delete)
1. Create Now to create a new record in your database write the following code in the newly created controller.
using System;
using System.Collections.Generic;
using System.Linq;
using System.Web;
using System.Web.Mvc;
namespace CRUDDemo.Controllers
{
public class CRUDController : Controller
{
public ActionResult create()
{
return View();
}
[HttpPost]
public ActionResult create(Student model)
{
using ( var context = new demoCRUDEntities())
{
context.Student.Add(model);
context.SaveChanges();
}
string message = "Created the record successfully" ;
ViewBag.Message = message;
return View();
}
}
}
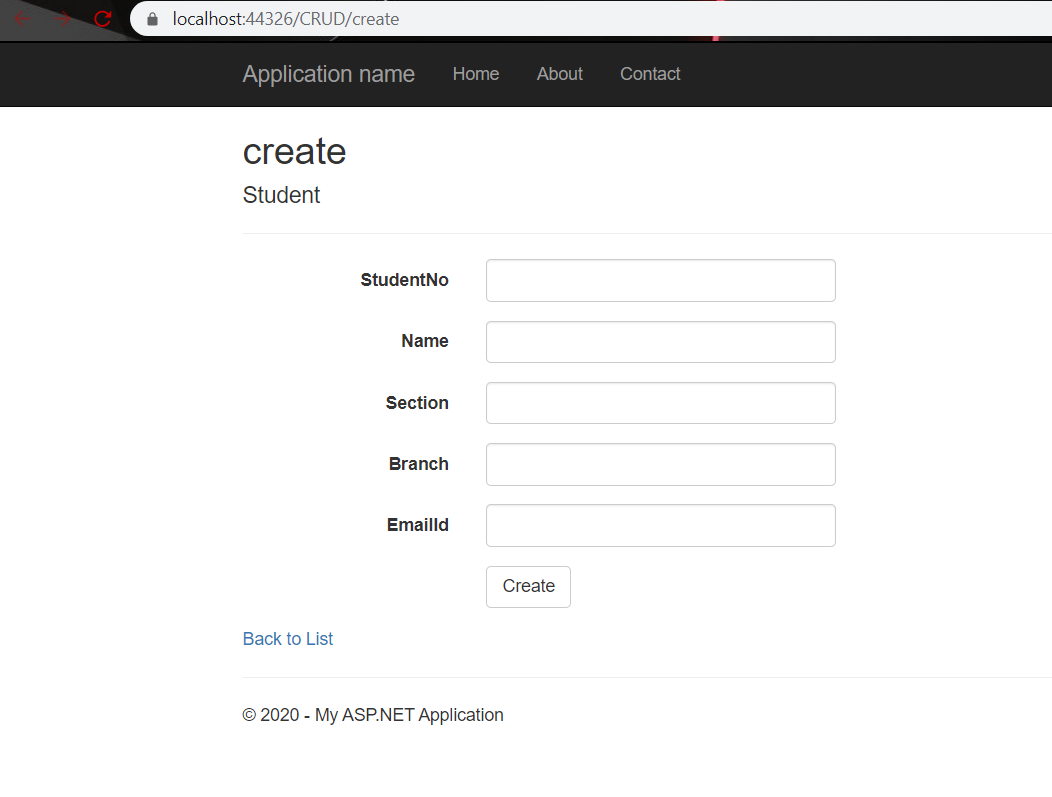
After this write click on the first action result and click on AddView and then select template as Create and model class as your own created model and data context class as your own created EDMX model. Then run the project and go the URL https://localhost:port_number/Controller_name/Action_Method_name
For example, https://localhost:44326/CRUD/create
2. Read: Now to See the added data on your screen follow the below-given code
using System;
using System.Collections.Generic;
using System.Linq;
using System.Web;
using System.Web.Mvc;
namespace CRUDDemo.Controllers
{
public class CRUDController : Controller {
[HttpGet]
public ActionResult
Read()
{
using ( var context = new demoCRUDEntities())
{
var data = context.Student.ToList();
return View(data);
}
}
}
}
After this add the View but remember to change the template as List. Then run the project and go to the URL
https://localhost:port_number/Controller_name/Action_Method_name
For Example https://localhost:44326/CRUD/Read

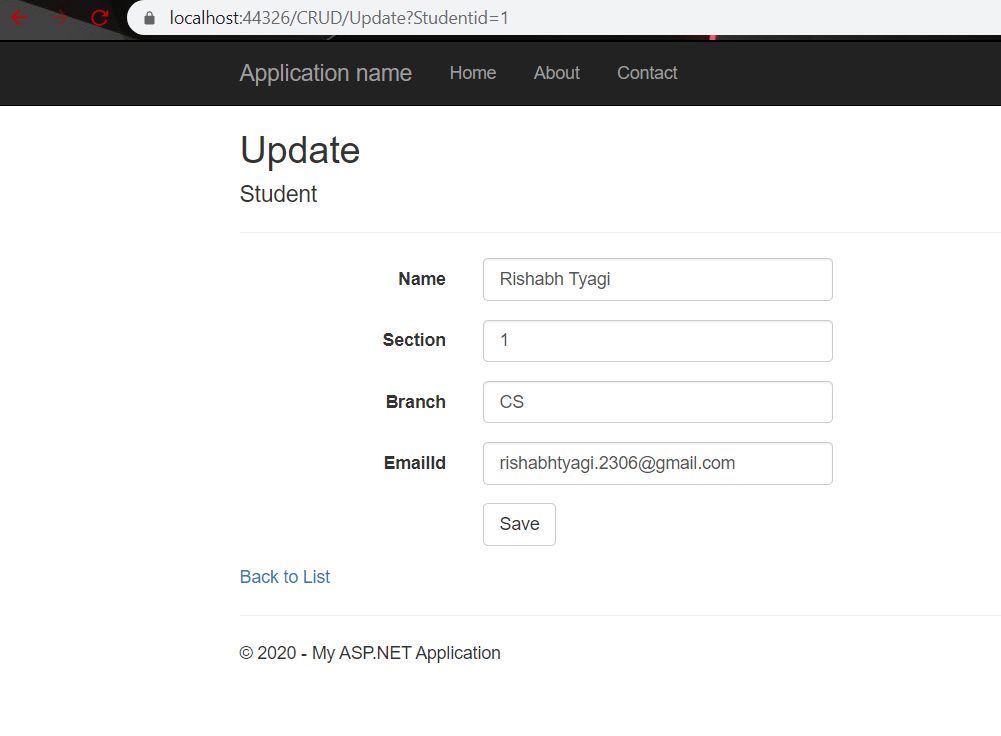
3. Update: Now, to update the existing record follow the code given below
using System;
using System.Collections.Generic;
using System.Linq;
using System.Web;
using System.Web.Mvc;
namespace CRUDDemo.Controllers
{
public class CRUDController : Controller
{
public ActionResult Update( int Studentid)
{
using ( var context = new demoCRUDEntities())
{
var data = context.Student.Where(x => x.StudentNo == Studentid).SingleOrDefault();
return View(data);
}
}
[HttpPost]
[ValidateAntiForgeryToken]
public ActionResult Update( int Studentid, Student model)
{
using ( var context = new demoCRUDEntities())
{
var data = context.Student.FirstOrDefault(x => x.StudentNo == Studentid);
if (data != null )
{
data.Name = model.Name;
data.Section = model.Section;
data.EmailId = model.EmailId;
data.Branch = model.Branch;
context.SaveChanges();
return RedirectToAction( "Read" );
}
else
return View();
}
}
}
}
After this add view similarly as done previously but remember to change the template to Edit. Then run the project and go to the URL https://localhost:port_number/Controller_name/Action_Method_name?ID_U_want_to_edit
For Example, https://localhost:44326/CRUD/Update?Studentid=1
4. Delete Now, to delete a record from the database follow the code given below
using System;
using System.Collections.Generic;
using System.Linq;
using System.Web;
using System.Web.Mvc;
namespace CRUDDemo.Controllers
{
public class CRUDController : Controller {
public ActionResult Delete()
{
return View();
}
[HttpPost]
[ValidateAntiForgeryToken] public ActionResult
Delete( int Studentid)
{
using ( var context = new demoCRUDEntities())
{
var data = context.Student.FirstOrDefault(x = > x.StudentNo == Studentid);
if (data != null ) {
context.Student.Remove(data);
context.SaveChanges();
return RedirectToAction( "Read" );
}
else
return View();
}
}
}
}
After this added view as done previously, but remember to change the template to Delete. Then run the project and go to the URL https://localhost:port_number/Controller_name/Action_Method_name?ID_U_want_to_Delete
For Example, https://localhost:44326/CRUD/Delete?Studentid=1

Note:
- The auto-generated HTML can be modified according to your choice.
- If you want to have a look at the full source code and how it works you can view my GitHub repository by clicking the GitHub Link.
How to Design a Web Page in Asp.net Using C
Source: https://www.geeksforgeeks.org/basic-crud-create-read-update-delete-in-asp-net-mvc-using-c-sharp-and-entity-framework/
0 Response to "How to Design a Web Page in Asp.net Using C"
Enregistrer un commentaire